Friday, 12 June 2015

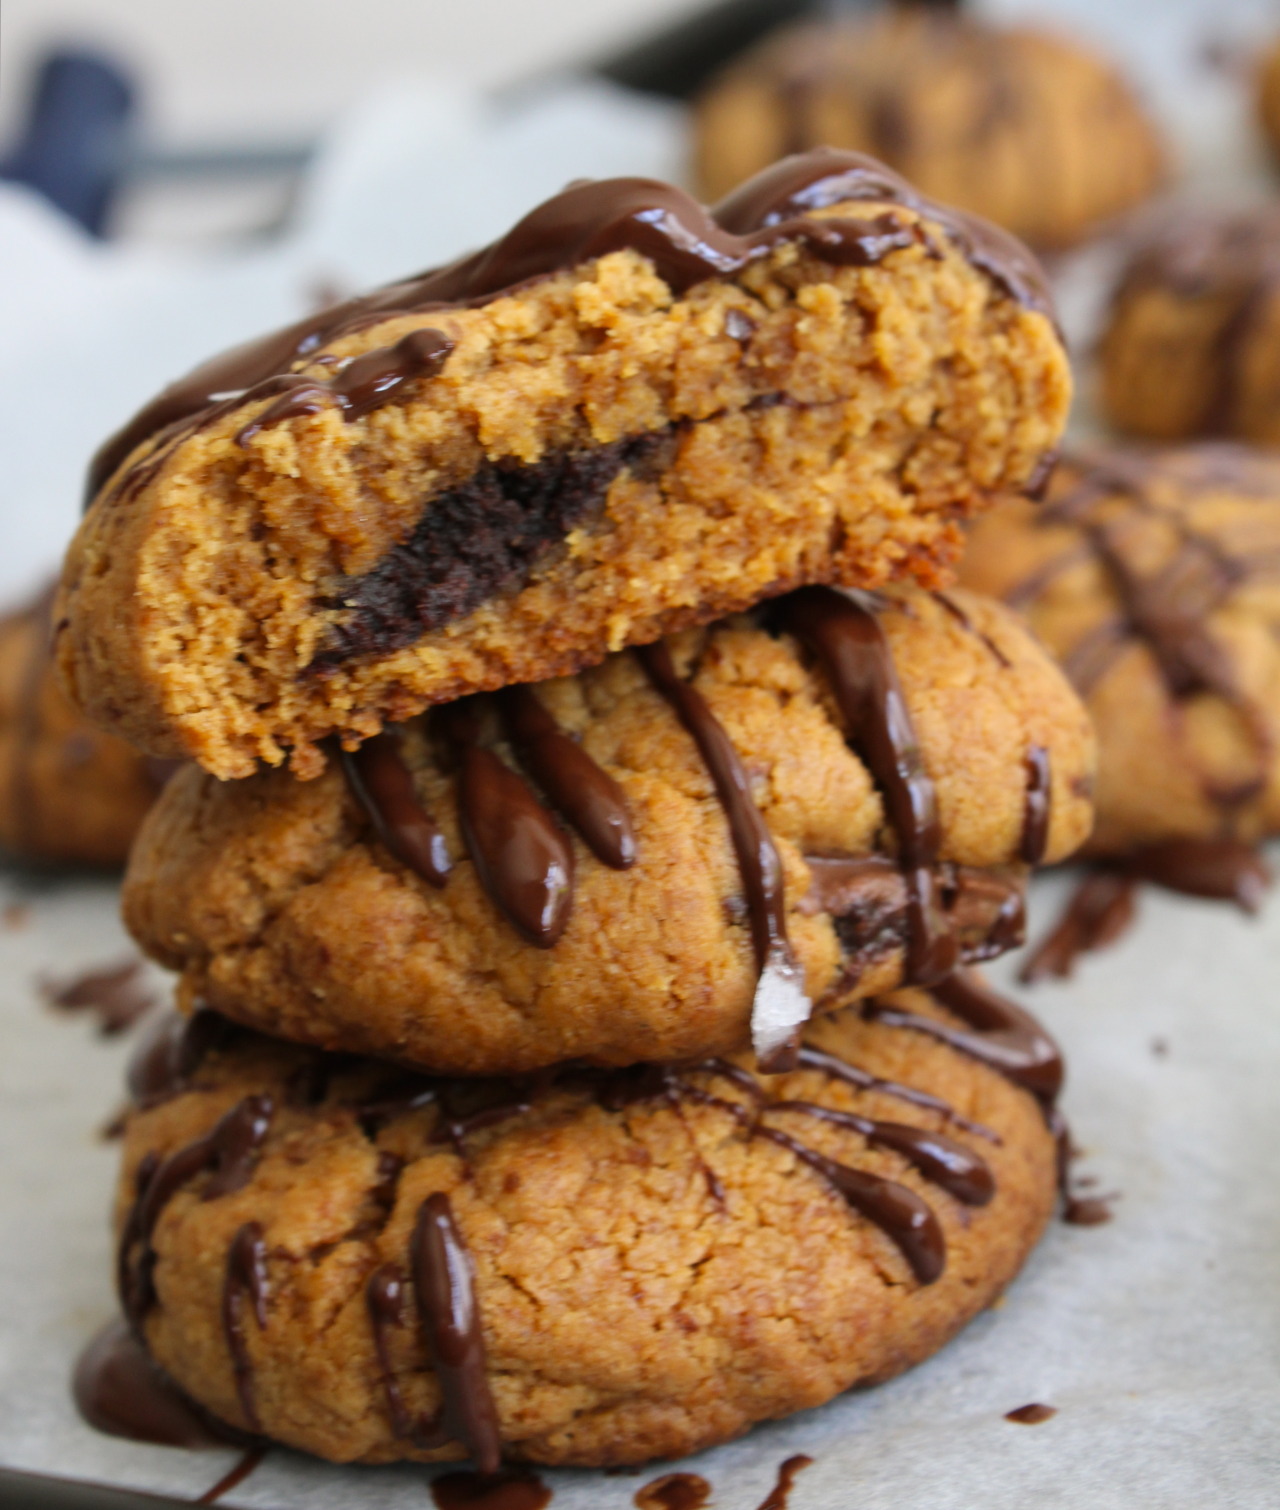
Nutella Stuffed Peanut Butter with Sea Salt

I may not still be in America, but if you think for one second that I'm going to let National Peanut Butter Cookie Day pass me by you are out of your mind. I love that there are days that exist as an excuse for us to all stuff our face with sweets.


I've never come across a peanut butter cookie I didn't like. Now that could just be me and my preference for peanut butter based cookies, or that could simply be that fact that peanut butter added to cookies amp up the taste factor no matter what.

The great thing about PB cookies is that they are one of the easiest cookie you can ever make, usually only require minimal ingredients. The bad thing about  PB cookies - they are so easy and tasty that you'll be tempted to make these all the time. At least that's bad for me and my lack of self control.


I think after this week I'll need to give it a rest with the sweets for a bit, as deep as my love for baking is. Trying to work out the kinks for this recipe I ended up making at least four batches of cookies to come up with just the right variation. In an effort to nix the grains and refined sugars I had to test a few different kinds to come up with what I think is the best one.


In the end, I decided on using coconut sugar as the sweetener of choice. I prefer the crumbly, melt-in- your mouth texture that coconut sugar provided. It's also lower on the glycemic index scale which I especially like. If you don't have coconut sugar and you're not so concerned about regular sugar, you can sub it for a 1-1 ratio. You can also substitute the coconut sugar for either maple syrup or honey, in which case you should reduce the amount from 1/2 cup to 1/4 cup. If you use a liquid sweetener, just expect to come out with cookies that are much more moist.


print recipe
Nutella Stuffed Peanut Butter Cookies with Sea Salt
What's better than peanut butter cookies? Peanut butter cookies stuffed with nutella and sprinkled with sea salt. Salty, sweet, and delicious!
Ingredients
  • 1 cup (250 grams) Peanut Butter
  • 1/2 cup (170 grams) Coconut Sugar
  • 1 whole Egg
  • 1 teaspoon Vanilla Extract
  • 1/2 teaspoon Baking Soda
  • about 1/4 cup (for stuffing) Refrigerated Nutella (homemade or store bought)
  • 1/4 cup Chocolate Chips
  • for sprinking Sea Salt
Instructions
1. In a medium sized mixing bowl mix together the peanut butter and sugar. Then add in the egg, vanilla, and baking soda until combined. 
2. Preheat your oven to 180C/350F 
3. Roll teaspoon sized balls of peanut butter onto a cookie sheet. Scoop about 1/2 teaspoon of nutella and place in the center of each ball. If you refrigerate your nutella before handling this part won't be nearly as messy. Once you have a little ball of nutella in the center of each cookie dough ball, take a little bit more of the peanut butter dough on sandwich the nutella in the center of the dough and roll it into a ball. 
4. Bake for 10-14 minutes and remove from the oven to cool. 
5. As the cookies cool, melt your chocolate chips over the stove top on the lowest possible heat. Stir constantly to prevent from burning. Once the chocolate is almost entirely melted, remove from heat. The chocolate will continue to melt without burning. While it's still hot, begin to drizzle the chocolate over the cookies. Sprinkle with sea salt over each cookie, and enjoy!
Details
Prep time: Cook time: Total time: Yield: 12-14 Bite Sized Cookies

You can also check out my almond butter cookies is you want a paleo option, or my very popular peanut butter oatmeal squares for an even easier recipe.

Thursday, 11 June 2015

Single Serving Dog Friendly Cupcake

There was a point in time when I proudly bragged about being a dog person. Since then, I'm glad to say that I have met many different cats that I have completely fallen in love with. Since moving to England I have found myself constantly surrounded by a colorful assortment of feline friends who've all added their share of humor and affection to my day to day life.


At least twice a week I walk into the kitchen to find Felix, the cheeky little black and white cat who lives a few doors down, stealing Stanley's dog food. Every open window is an invitation to Felix. One time I caught him on the counter polishing off the left over shrimp curry I made for Mike. Basil, the ginger cat across the road also likes to find his way in through open windows. I remember one evening in particular when Basil somehow managed to jump up through the kitchen window above the sink. Once he found his way up on the window ledge, he realized the only way down was into the skin. I don't even know how he managed to jump up to the window in the first place - I can barely reach that window to open it most of the time.


I can go on listing stories about our own cats, Rita and Mabel. Rita has more personality in one paw than most people I've ever met. Feisty doesn't even begin to describe it. As for Mabel - bless her we're almost certain she has a case of feline schizophrenia. She has to take a small dose of natural anti-depressants daily to calm her nerves. I love both our cats immeasurably.

As much as I adore all the cats in my life - deep down, I'm still a dog girl. There are very few times that I can remember not having at least one dog growing up. Just  thinking about what all my dogs have meant to me, I get emotional. Whenever I felt like I was going through a particuarly rough time in my life, I always had a dog to look at me with their big dumb smiles, wag its tail, and remind me that things weren't so bad after all because here in front of me sat a creature who loved me just as much as I loved him/her.


I'm reminded of a quote I once heard about dogs (and pets in general) that went something along the lines of, 'they may only be a small part of our lives, but to them we are their wholes lives'. It's the heartbreaking fact that at some point we have to realize that we're going to outlive our pets. They give us nothing but love and affection, and in some cases a lot of fur around the house and probably a few 'accidents' here and there, so why not give them just as much love in return and make their lives as special as they can be?

Bosco has had more than his share of bad hair cuts
Today is Stanley's 4th birthday. I know how much Stanley means to my new family and all the joy he has brought into their lives by being his unadulterated self, so I thought I would make it extra special for him by making him his very own dog friendly birthday cake.

Instead of making an entire cake for him like I have seen many people do, I thought it best I just make him his own little cupcake instead - that way he couldn't over do it with the food. This recipe makes either one jumbo size cupcake, or two regular sized ones. It's aimed for dog tastes, but it's certainly edible if you want to share one with your hound. Just make sure you don't leave any apple seeds around because those aren't good for dogs.


PS Mom & Dad - you better believe Bosco is getting his own cupcakes when we visit in the winter!


print recipe

Doggy Peanut Butter Cupcake
A dog friendly, single serving cupcake to celebrate the special hounds in your life! Grain free and no added sugar.
Ingredients
  • 1/2 finely diced Apple
  • 3 tablespoons + more if desired for frosting Peanut Butter
  • 1 Egg
  • 1/2 teaspoon optional Baking Powder
  • optional Bacon
Instructions
1. Preheat your oven to 180C/350F 2. In a small bowl mix together all of your ingredients until combined. 3. Spoon the mixture either into a cup cake sized ramekin or into a regular cupcake tins. You can make either one jumbo cake, or two average sized cupcakes. 4. Bake for about 20 minutes or until a tooth pick inserted into the center comes out clean. 5. Allow the cupcake to cool completely. You can leave it as is, or frost with peanut butter and sprinkle with bacon bits.
Details
Prep time: Cook time: Total time: Yield: 1 jumbo cupcake or 2 regular sized cakes

Omm nom nom


Wednesday, 10 June 2015

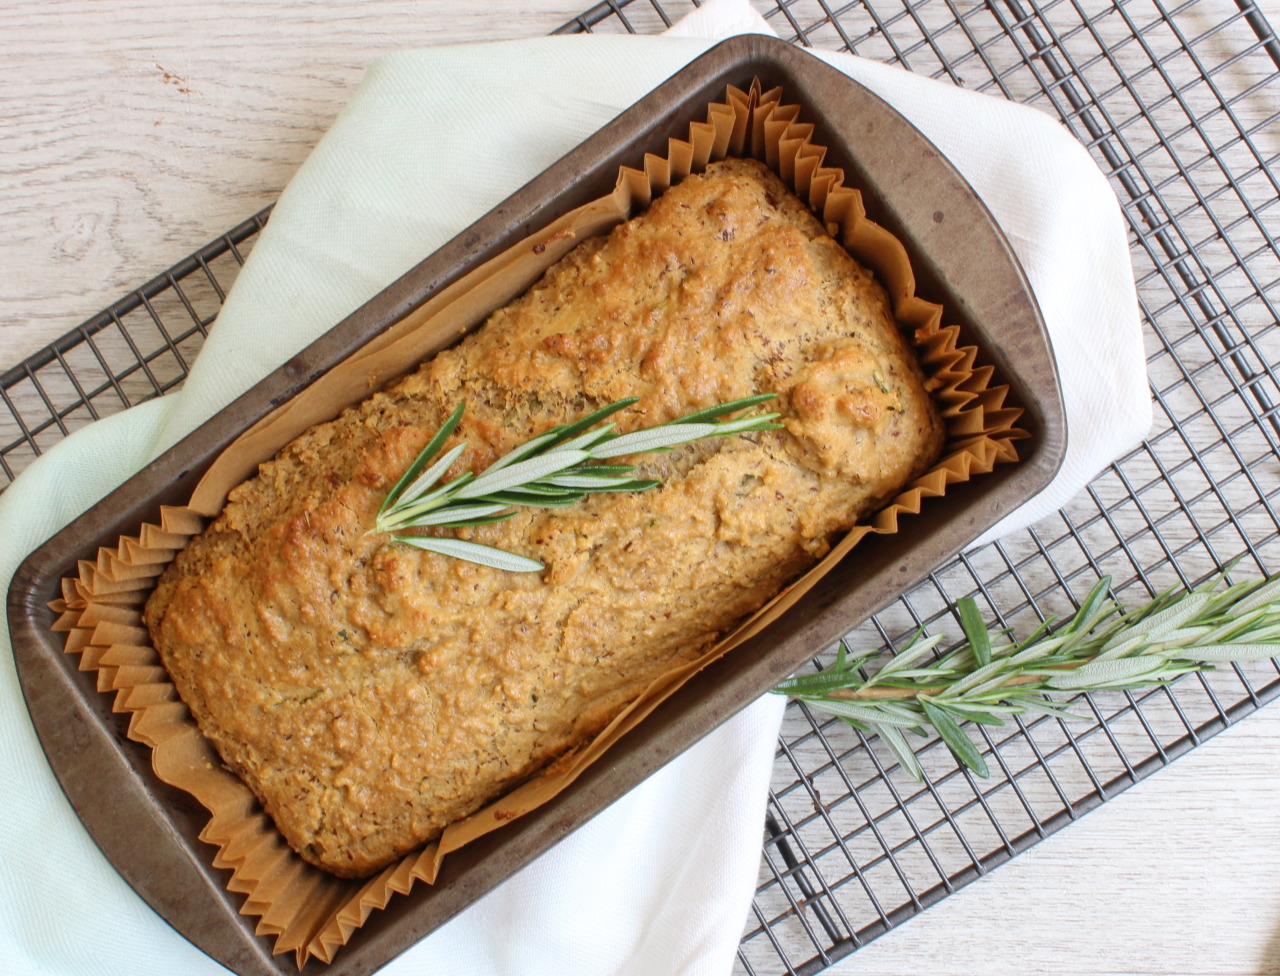
Savory Rosemary Almond Loaf Bread

Whenever I do my weekly shopping trip I always make sure to throw in a few bags of fresh herbs. I don't particuarly have any plans for what to do with the herbs, but I can't count the number of times I've pulled up a recipe for something that looks mouthwatering only to realize that I'm missing crucial fresh ingredients.


If I were a more organized person I probably would have gotten around to growing my own at home. In the past I've bought a few potted basil plants, but I'm so heavy handed with basil that we just ended up with a pot of dirt sitting on the kitchen table for a couple weeks. In the end I figured I may as well buy the bags and save myself the hassle of wiping dirt off the table every day. I'll get around to it....eventually.


This week I ended up with an extra bag of rosemary and a hankering for a piece of bread which lead me to come up with this recipe for a grain free rosemary and almond flour bread. I could have made my usual Gluten Free French Bread - by far my most popular recipe that I've ever put up. To be honest though, I've been trying to cut down on grains in my diet. Mike could do without the extra inflammation and I'm always a much happier, energetic person when I clean up my diet a bit.


If you're new to gluten free/grain free baking you may be a bit thrown off by seeing the psyllium husk listed in the ingredients (psyllium, said like silly-um). It can usually be found in health stores because of its useful attributes in lowering LDL cholesterol over time and its gentle laxative effects. Not bad. Psyllium husk in gluten free baking assists in both the rise and binding of ingredients. Think xanthan gum without the stomach upset. So in addition to being free of sugars, grain, and other potential gut irritants, this savory bread is also packed with heart healthy fiber and nutrient dense flours.

You won't be thinking about any other bread when this is fresh out of the oven with the a slab of butter melting into the crust and the scent of rosemary wafts through the air.


print recipe

Savory Rosemary Almond Bread
A savory rich bread made from a blend of nutrient dense flours and fiber rich ingredients tied together with the earthy aroma of fresh rosemary.
Ingredients
  • 1 1/2 cups (144 grams) Almond Flour
  • 1/2 cup (61 grams) Tapioca Flour
  • 3 tablespoons (21 grams) Coconut Flour
  • 1 teaspoon Baking Soda
  • 1 Tablespoon Psyllium Husk
  • 1/2 teaspoon Salt
  • 2 tablespoons chopped Fresh Rosemary
  • 3 tablespoons (1.5 fll) Hot Water
  • 1 teaspoon Apple Cider Vinegar
  • 4 Eggs
  • 1/2 cup (4 fl) Extra Virgin Olive Oil
Instructions
1. Preheat the oven to 180C/350 F
2. In a small bowl mix together your psyllium husk and hot water. Stir until throughly mixed. Set it aside to gel up. 
3. In a large mixing bowl sift together the remainder of your dry ingredients plus the chopped rosemary. 
4. In another mixing bowl beat together your eggs until the become a light yellow and slightly frothy. Add the olive oil, the ACV, and the gelled up psyllium husk and stir until smooth. 
5. Add the wet ingredients to the dry ingredients and combine. When mixed scoop your mixture into a lined or greased load tin and place it in the oven for 30-40 minutes depending on your oven. When the top is a nice golden brown and the bread doesn't jiggle when you move it you know it's done.
Details
Prep time: Cook time: Total time: Yield: 1 loaf

Monday, 8 June 2015

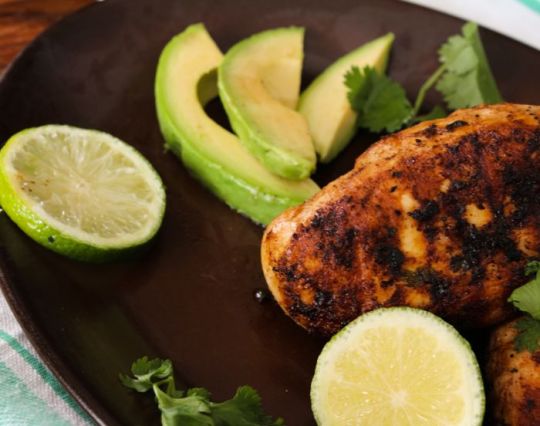
Cilantro Lime Chicken

I don't know about you guys, but when it comes to cooking I have the tendency to go a bit rogue. By that, I mean that I mostly just throw things in a pan and hope it comes out right. Most of the time this works out pretty well, though I would be lying if I told you that I've never overdone an ingredient or two and came up with something that barely resembles food. I'm sure Mike could tell you a thing or two about those mishaps.

Don't worry though. I've changed my ways since starting my own food blog. I'm far too terrified of forgetting an ingredient or step to play around like that when it comes to posting recipes. I'm still very much in the beginning stages of this blog that I'm absolutely flattered whenever I hear someone has tried one of my recipes and would never want to let anyone down.

I could go on about the challenges of food blogging - don't get me started on the photography part - but this is, after all, a food blog. So on with the food!


Being that it is summer - or so I'm told - there are certain meals that are simply a must.

If you're a fan of easy and delicious meals - then this cilantro and lime chicken is definitely one of them. Even if you're not particuarly a big cilantro fan, I'm sure I could win you over with this tender and juicy chicken. The fresh, bright flavors also work well if you want to slice it up and toss it in a salad for later meals.

Once again, I've made this low FODMAP which means I used garlic infused olive oil instead of garlic. If garlic isn't an issue for you or you don't have any infused oil feel free to add one clove of garlic. I did however add a 1/2 teaspoon of onion powder. That small of an amount spread through the entire marinade isn't enough to set off Mike's stomach troubles and I don't imagine it will be a problem for many people. If it is an issue just leave that bit out.


print recipe

Cilantro Lime Chicken
This cilantro and lime chicken takes a minimum amount of effort for a maximum amount of flavor perfect for easy weeknight dinners.
Ingredients
  • 4-5 Chicken breasts
  • 4 tablespoons Chopped Cilantro
  • 2 tablespoons Freshly Squeezed Lime Juice
  • 1/2 cup Garlic Infused Olive Oil
  • 1/2 teaspoon Onion Powder
  • 1/2 teaspoon (or to taste) Cayenne Powder *omit if AIP
  • 1 teaspoon Salt
  • 1 teaspoon Pepper
  • 1 lime Lime Zest
  • 1/2 teaspoon Fish Sauce
  • Coconut Oil for frying
Instructions
1. In a small bowl, make your marinade by mixing together everything except for the chicken breast. 2. Add your marinade and the chicken breast to a large ziplock bag. Seal and toss until each chicken breast is coated. Refrigerate and marinate for at least 30 minutes, but ideally for a few hours. I like to prepare this in the morning and then take it out to cook by the time dinner rolls around. 
3. When you're ready cook, take the chicken out of the fridge and let it rest on the counter while you heat a skillet with oil. Once the pan is hot enough, add the chicken and allow it to fry undisturbed on one side until you see the sides begin to cook, about 7-10 minutes. Flip each piece over and allow it to cook an additional 5-10 minutes. 
 4. When your chicken is fully cooked, remove from heat and allow it to rest for a few minutes before cutting and serving. Squeeze a little extra lime juice and garnish with cilantro is you choose and enjoy!
Details
Prep time: 30 mins - 8 hrs Cook time: Total time: Yield: 4 Servings


How do you guys cook? Are you more of an intuitive chef, or do you follow each recipe to the T? 

Friday, 5 June 2015

Crispy, Batter Cod with a Buttery Lemon Basil Drizzle

Today's recipe is a straight forward, traditional battered cod recipe sans gluten and paired with a buttery lemon basil sauce. Just in time for Fish Friday.


Tuesday, 2 June 2015

Grain Free Granola Round #2

I've been on a bit of a breakfast kick lately. Breakfast is, after all, the most important meal of the day. And let's face it, breakfast foods are just plain old fun. Pancakes, waffles - don't even get me started on french toast.


Saturday, 30 May 2015

Simple Coconut Flour Pancakes

If there is one meal that I can always count on to be fuss free - it's breakfast. Mike and I are bacon and eggs kind of people, and I love it that way. It just makes mornings so much easier. Everyone knows that bacon is basically natures candy, and eggs are the easiest things in the world to season right. I'll chop up and throw in whatever left over veggies are found in the fridge, and I'm full for hours - no mid morning snack required.

Some mornings, however, I just need something a little different.


Thursday, 28 May 2015

Low Fodmap Chicken Paella

Story time! It's a bit of a long story with lots of little details that matter, but I'll try to keep it short because

P A E  L L A .


Monday, 25 May 2015

Juicy Turkey Burgers - Low Fodmap, Paleo, & AIP adaptable

You'd have thought that after keeping vigilant for over a year about gluten, gluten containing products, and even gluten cross contamination that I would think twice about haphazardly throwing anything in my shopping basket without flipping it over and reading the ingredient label. Everything has gluten in it...seriously everything.

But no. Even after all this time, I still slip up with checking my labels.


Wednesday, 20 May 2015

Healthy Socca Pizza

If you haven't tried making my Simple Socca recipe from the other week, you may want to now. This next recipe uses the melt-in-your-mouth, chickpea flatbread as  delicious, gluten-free pizza base.


Socca is at the same time filling and light. Unlike more traditional pizza crusts that leave you almost a bit too full, using this as a base satisfies while sparing you the feeling of being stuffed like a turkey at Thanksgiving. It also works as a perfect vehicle for getting your favorite pizza toppings from point A (the plate) to point B (your face).

So, gather up your favorite pizza toppings, heat up the broiler, and prepare for delicious, mouthwatering pizza.


Ingredients

  • Simple Socca flatbread
  • 2-3 tablespoons marinara or pesto sauce
  • 1/2 courgette, ribboned
  • 1/4 cup (40 grams) feta cheese crumbled (use vegan substitute if you choose)
  • 1/4 cup chorizo pieces (or a small handful)
  • 4-6 cherry tomatoes, sliced (Don't use cherry tomatoes if you want this to be low fodmap. Other tomatoes are fine.)
  • small handful of basil leaves
  • top with your favorite dried herbs
These are the ingredients that I used for my pizza, but feel free to change the amounts adding more of what you like/decreasing what you dislike. It's your pizza - have fun with it!

Method

  1. Prepare the socca according to the original recipe. 
  2. Set your oven to 425F/220C
  3. Spread your sauce sauce along the base and then top with whatever toppings your choose to use.
  4. Bake for 8-10 minutes until your cheese begins to brown. Remove from the oven, sprinkle with dried herbs and allow to cool for 2-3minutes before digging in.

Thursday, 14 May 2015

Creamy, Roasted Red Pepper Pasta Sauce (Paleo and Vegan Option)

One of the best purchases that I've made so far this year was to buy a julienne peeler, or as we like to call it, the 'zoodler'. I mentioned it briefly when I posted my go-to salad, and I use it to make my favorite Carrot & Courgette Fritters. Basically, I use it for everything. It hardly ever leaves the drying rack in our kitchen because I'm constantly using it to slice up vegetables to mix into our food. 

So as you can probably imagine, we're slicing up courgette's left and right to make our own grain free pastas. Not only is this a healthier alternative to eating regular pasta, but it's also much more filling because of all the fiber you're taking in. 

It also means that I get to play around in the kitchen more to come up with different ways to eat our zoodles. After spending enough time oogling over pictures of red pepper sauces online, I finally made it around to try it out myself with a few tweaks to make it grain and dairy free. The roasted red peppers give the sauce a subtle sweetness with a creamy texture while the garlic and onions provide a more robust flavor.


Feel free to add your own noodles to this sauce because even without the courgette you're still getting a decent serving of vegetables between the peppers, onions, and garlic. 

Ingredients

  •  2 red peppers
  • 1 white onion, roughly chopped
  • 4 cloves garlic, minced
  • 2-3 tablespoons extra virgin olive oil
  • 1 cup chicken or vegetable broth
  • 2 tablespoons nutritional yeast*
  • 1 tablespoon arrowroot starch or corn starch
  • salt and pepper to your taste
  • 1 bunch chopped parsley and/or basil
*If you don't need this to be dairy free and you don't have nutritional yeast on hand you can sub it for parmesan to get that cheesy taste. 

Method 

1. Heat your oven to 500F/260C and roast your red peppers on a baking sheet for about 20-25     
minutes until they become charred. 


2. While the peppers are roasting, saute your garlic and onion in the olive oil on a large skillet for about 4-5 minutes on medium heat until they soften. Once they have sauteed long enough, set your skillet aside to cool until you're ready to blend everything.

3. Take this time to either slice your courgette or prepare your gluten free pasta according to the directions on the package.

4. When your peppers are done roasting, take them out of the oven and allow them to cool for at least 5-10 minutes. You're going to need to peel the skin off so they need to be cool enough that you don't burn your fingers. After they have charred, the skin shrinks up a bit making it easy to grab onto a bit of skin letting your peel it easily. After both peppers are peeled, remove and discard the stem and seeds.

5. Next, add your sauteed garlic and onions, the peppers, nutritional yeast, broth, arrowroot/cornstarch, salt and pepper to a blender and blend until smooth.

6. Once you have smooth, creamy mixture add your sauce back to your skillet that you used to saute earlier and reheat the red pepper sauce on medium heat bringing it to a simmer. Feel free to add any additional seasonings at this point: oregano, red pepper flakes, etc. Play around with what you like. 


7. If you are using zoodles, make sure to heat them up in a skillet before adding your sauce. Top with fresh herbs and parmesan and enjoy.


Tuesday, 12 May 2015

Traditional, Gluten Free Toad in the Hole

In honor of Coeliac Awareness Week, I wanted to post at least one gluten free alternative to a popular comfort food.

Enter: Gluten Free Toad in the Hole. What's more traditionally British than sausage and Yorkshire Pudding?


As an American who didn't even know what a Yorkshire Pudding was until my first visit to England when I was 20, I feel a bit gipped knowing I went so long without having anything quite so tasty. To make up for lost time, I went through a number of batches of yorkshire pudding recipes this last week before I was able to come up with this recipe for Toad in the Hole....no complaints from anyone here.

This recipe is perfect for anyone who wants a make ahead meal. This is especially ideal for us because week our kitchen is going under construction. Today I'll be busy prepping away over the stove to get ready for a few days without an oven. Much to Mike's pleasure, I'll be making his favorite Honey & Ginger Chicken to have for the next few days because it still tastes amazing cold.
I think I'll also be making some more of this to freeze for later use.


Ingredients

For best results, use room temperature ingredients

  • 1 cup (122 grams) gluten free all purpose flour
  • 2 teaspoons baking powder
  • 1/2 teaspoon sea salt
  • 1/2 teaspoon ground black pepper
  • 3 eggs
  • 1 cup milk (250 ml) For a lactose free alternative, you can substitute for 1 cup almond milk (240ml)
  • 3-4 gluten free sausages, we use Black Farmer Gluten Free Sausages
  • 2 tablespoons duck fat, butter, ghee, or fat of your choice. 

Method

  1. Heat the oven to 400F/200C.
  2. Pour the fat into the bottom of your roasting tin and then put your sausages in the tin, rolling them around until they are coated in the fat. Roast them in the oven for 10-15 minutes until browned.
  3. While your sausages are roasted, prepare your batter. In a medium sized mixing bowl, mix together all of your dry ingredients until thoroughly combined.
  4. In a small mixing bowl, whisk your eggs until slightly frothy. Then begin pouring your milk into the egg mixture, stirring to combine.
  5. Pour your egg and milk into the flour mixture and whisk until smooth.
  6. When your sausages are done, remove from the oven and pour your batter over the sausages and then return to the oven to bake for an additional 30-35 minutes until the top has turned a golden brown and the batter has risen. 


Monday, 11 May 2015

Coeliac Awareness Week May 2015

Today marks the first day of Coeliac Awareness week. Despite the growing number of gluten free food products that we find walking up and down store aisles, many people still don't realize that Coeliac Disease is not a food intolerance, but a serious autoimmune disease. 

I also just learned today that it is ME/Fibromyalgia Awareness Week as well. CFS/ME is an extremely controversial illness because of how vastly different it is from person to person. There are a number of reasons why a person might be affected by ME, but I do find it astounding to see such a strong correlation between undiagnosed Coeliac Disease and ME. In fact, it's amazing to me how many autoimmune diseases are negatively impacted by the consumption of gluten even without being Coeliac.

I think many people struggle to accept how important the food we eat actually is sometimes. Anyone who has ever owned a pet knows this intuitively. If your dog gets sick and starts acting out of character one of the first things you might ask yourself is 'what did they eat?'. How many times have we done that with ourselves? Sure, if you come down with a bad stomach ache, you might piece two and two together, but no one stops to think why they might be feeling tired and achey.

I don't mean to turn this into a gluten-is-the-root-of-all-evil thing, though in Mike's case that might actually be true. I just hope that people will read this and look within themselves to discover what things could be impacting their wellness. 


Sources: 
http://www.nhs.uk/Conditions/Coeliac-disease/Pages/Causes.aspx
http://emedicine.medscape.com/article/1790189-overview
http://www.glutenfreehelp.co.uk/medical-research.html


Sunday, 10 May 2015

Simple Socca: A Chickpea Flatbread

In Italy it's called farinata 'made in flour' and in Tuscany it's called cecina 'made of chickpeas'. In France, more specifically in Nice, it's a popular street food called, socca. I call it delicious.

Socca is an incredibly simple recipe that is naturally vegan and gluten free requiring only a few ingredients. Chickpea flour, water, oil, and whatever seasonings you want to throw in the mix.

Personally, I love simple recipes. Since I try to make the majority of food we eat from scratch, I appreciate recipes that I can throw together in limited time without having to use difficult to source, pricey ingredients. Not to mention, Mike has so many trigger foods, gluten being only one of them, it's just easier for us from both a mental and practical stand point to just make it all ourselves.

Sprinkle in a few herbs and customize this recipe to your own flavor profile. Serve with a dip, use as a pizza base, or enjoy on it's own - you can easily make this for yourself with no sweat off your back.


Ingredients

  • 1 cup (92 grams) chickpea flour (gram flour)
  • 1 cup (235 ml) water
  • 2 tablespoons extra virgin olive oil plus more for oiling the pan
  • 1/2 teaspoon sea salt
  • pepper to taste

Method

  1. Whisk together the water, chickpea flour, oil, and salt in a bowl until all the clumps are gone. Them cover and let the flour absorb in the water for at least 30 minutes to an hour. If you want, you can leave the mixture to sit for up to 24 hours, but who wants to wait that long?
  2. Place a 9-10 inch skillet, cake tin, or whatever shallow oven safe baking dish you can find in the oven and preheat to 450F/230C.
  3. After the oven is heated fully, drizzle 1-2 tablespoons more oil in the skillet and swirl around until the bottom and sides are coated.
  4. Quickly whisk your chickpea batter once more to make sure everything is properly combined, and then pour the batter into the skillet. Place in the oven and bake for 10-15 minutes, until the sides begin to crisp and the top turns slightly golden brown. You may need to babysit the socca depending on your oven. Mine has a lot of hot spots so I have to keep turning it even few minutes to prevent too much burning in any one area.
  5. For a crisper, more golden top you can turn the oven heat up to broiling and leave in the oven for another couple of minutes.
  6. Let cool for at least 5 minutes before slicing and serving. 

I quite like this sliced into chip sized pieces and topped with my basil & avocado dip.


Wednesday, 6 May 2015

Creamy Basil & Avocado Dip

Guacamole + pesto + hummus = your new favorite multitasking condiment


I call this a dip for the sake of ease, but really this 'dip' can be anything you want it to be. I've also used this recipe as a pasta sauce, a sandwich spread, and a salad dressing. The question is, what don't I put this on? It's fast, it's versatile, and it's delicious - it's everything you want out of a recipe.

I don't think any description I could come up with would do it justice. The avocado mixed with the tahini makes it perfectly creamy while the lemon and garlic add a bit of sharpness. It's fresh and flavorful, and only requires a few ingredients.

Ingredients

  • 1 large, ripe avocado peeled and diced
  • 1 small lemon, juiced
  • 1/4 cup  (60 ml) water 
  • 1/4 cup (58 grams) tahini
  • 3 tablespoons fresh basil chopped 
  • 1-2 cloves garlic (your preference) 
  • sea salt to taste

Method

  1. If you have a high powered blender, all you need to do is throw everything in the blender and blend until smooth, probably for about 30 seconds. If your blender isn't as strong, you may need to mince your garlic and basil first to make sure everything gets mixed thoroughly. 

This makes about 1 1/2 cups and will keep in the refrigerator for about a week.

Sunday, 3 May 2015

Oatmeal Peanut Butter Squares

Everyone needs at least one go-to peanut butter recipe under their belt. You just have to. They're perfect for when you've got a sweet tooth you can't kick and you want something easy to throw together.

The best part about peanut butter cookie type desserts is that they are usually naturally gluten free, so you don't even have to worry about trying to figure out how and what to substitute in place of flour. If you do need to be careful about gluten cross contamination, make sure you use certified gluten free oats for this or any recipe because often times oats are produced in factories that deal with flours and other grains.


I'd call this a guilty pleasure, but I'm a big believer in food for the soul, and you just can't feel guilty about eating anything quite so tastey.


Normally I just go for the standard cookie method, but I decided to play around a bit to make an already simple recipe even easier. All you need is one mixing bowl, one baking tin, a handful of ingredients, and about 30 minutes start to finish.

Ingredients

  • 1 cup (250 grams) peanut butter, crunchy or smooth (natural, oily peanut butter isn't ideal)
  • 2 eggs
  • 1/2 cup (100grams) packed brown sugar
  • 2 teaspoons vanilla extract
  • 1 teaspoon baking powder
  • 1 cup (90 grams) certified gluten free oats
  • 1/4 cup (45 grams) chocolate chips optional

Method

  1. Preheat your oven to 350F/178C and line/grease an 8x8 inch square baking tin.
  2. In a large mixing bowl, mix together the peanut butter, eggs, sugar, and vanilla until smooth. If you want to use an electric mixer for this, handheld or standing, mix at a medium speed. You can definitely do this by hand though like I did, it just takes a little extra work with the peanut butter and the eggs. I like a good workout mixed in with my baking though.
  3. Stir in your baking soda and oats until combined.
  4. Once everything is mixed together completely, press your dough lightly into the baking dish making sure it's evenly distributed. Bake it in the oven for 15-17 minutes depending on your oven. To check that it's finished, stick a tooth pick or knife into the center and when it comes out clean you're done.
  5. You can either stop here and enjoy your freshly baked bars, or keep going to add a little chocolate. While you're letting your bars cool on a wire rack, begin to melt your chocolate in a small sauce pan, stirring constantly. You can either do this part in the microwave in 30 second intervals, stirring between intervals until it's completely smooth.
  6. Once your chocolate is melted, drizzle it over the tops of your bar. Just go crazy with it. Slice, and enjoy. 

This recipe was brought to you by peanut butter & chocolate - the world's favorite partners in crime.